
Before downloading and installing BEE Lab, make sure that you are signed in to a Windows account with local Administrator privileges.
Connect the NeuroAmp to the computer and leave it connected until the installation is finished.
1. Click on this link to download the BEE Lab web installer: https://bee.sg/BEELab_web_1.0.2.exe

2. Click on the BEELab_web_1.0.2.exe Web installer to open the installer

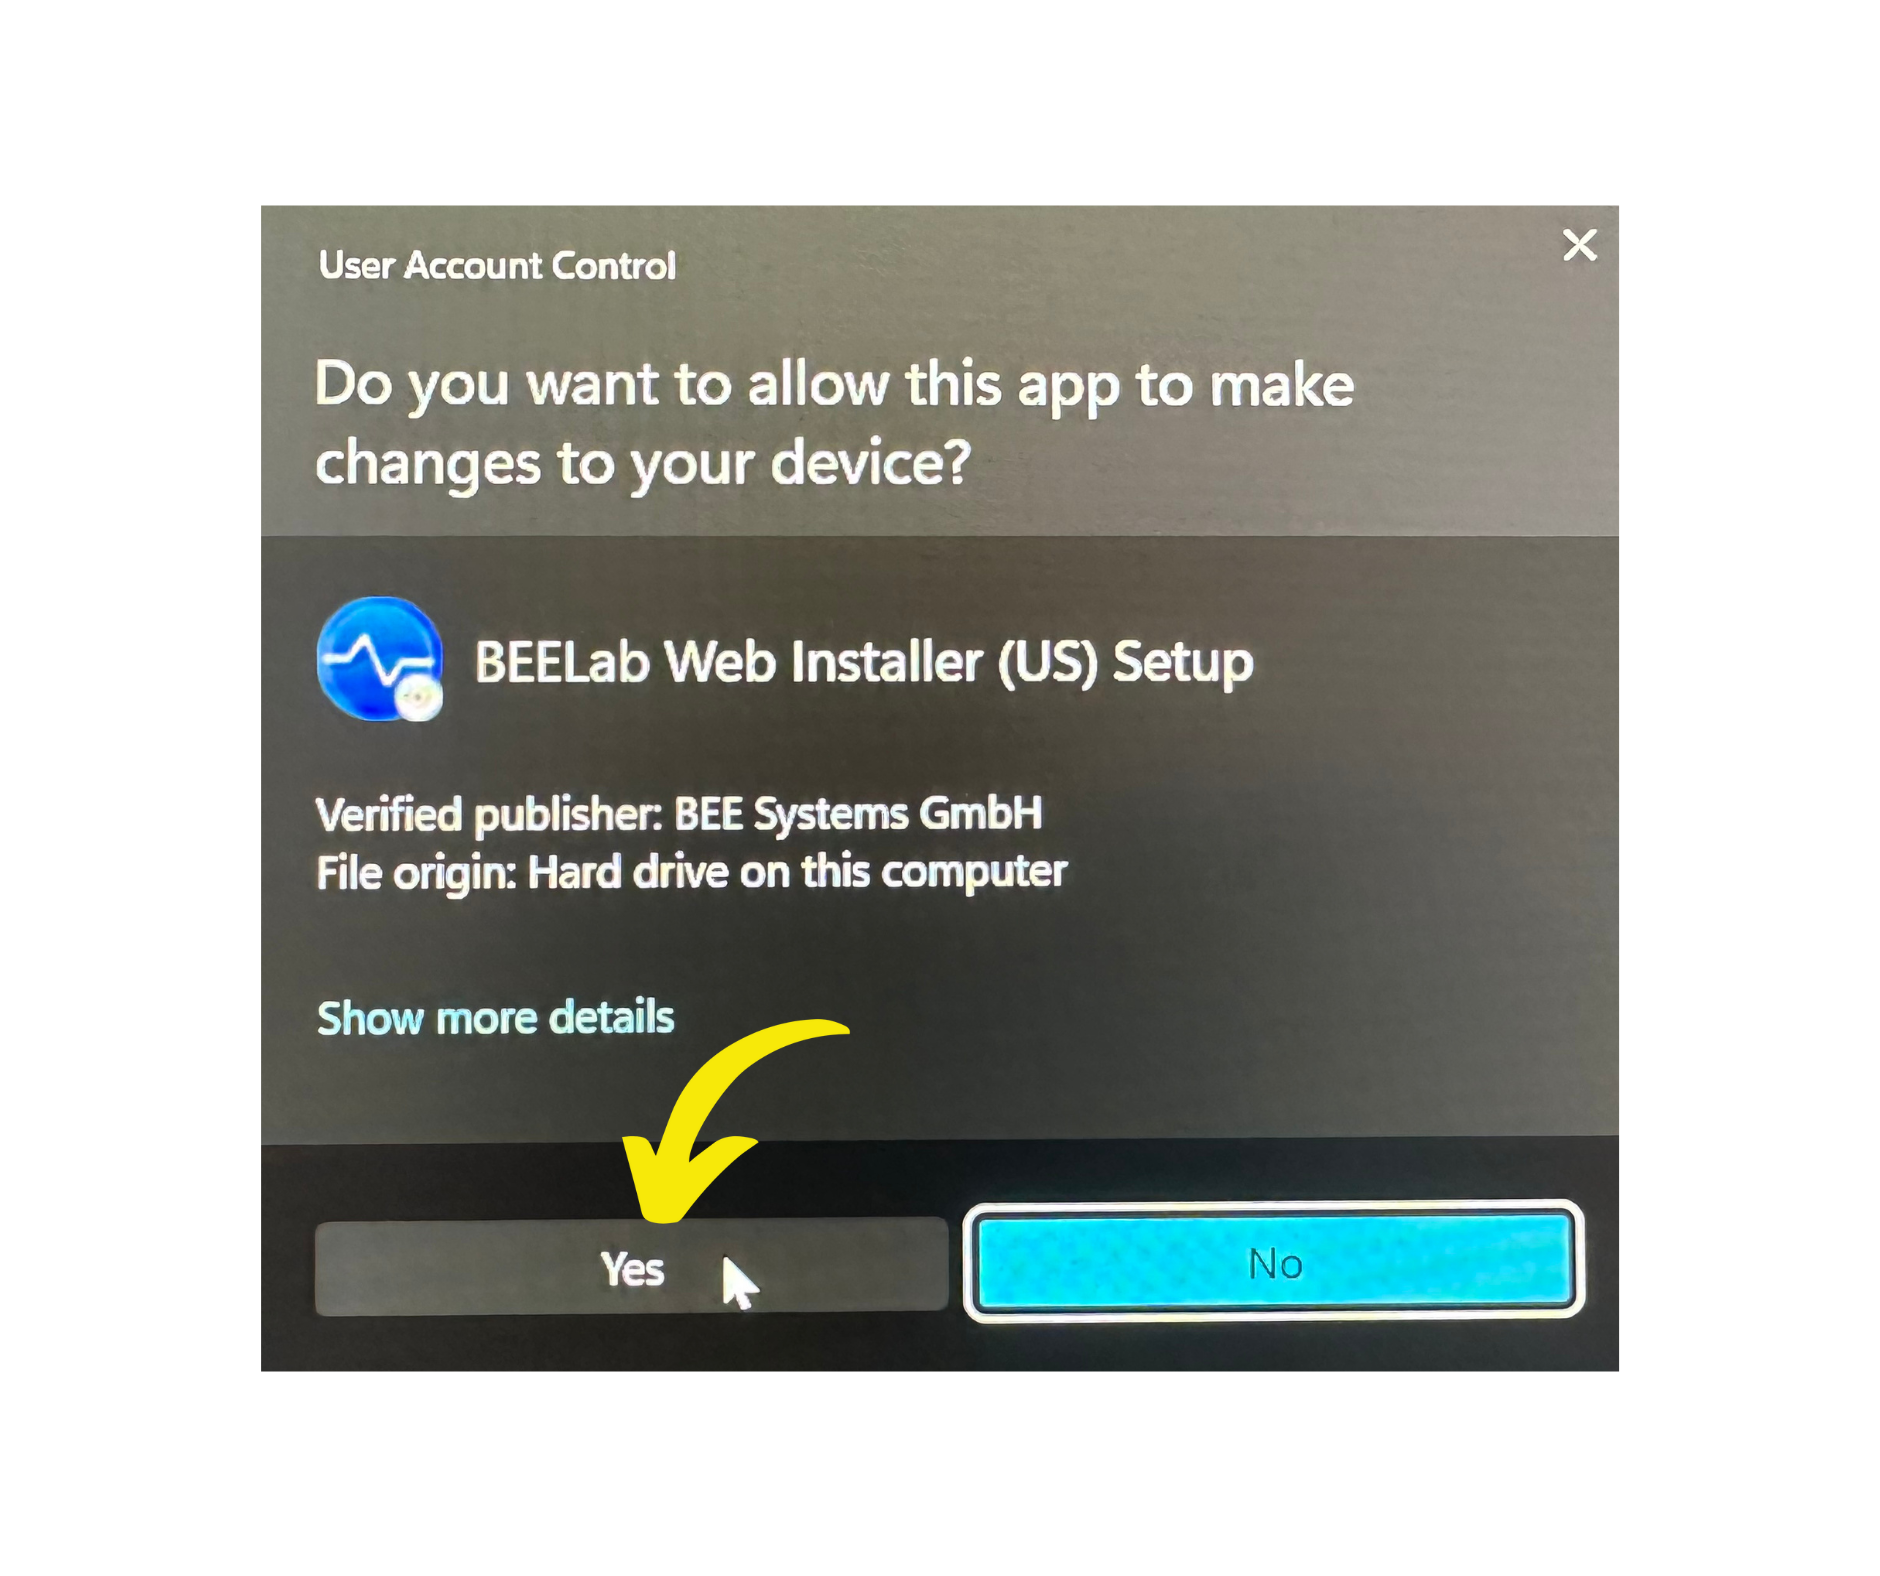
3. Do you want to allow this app to make changes to your device? Click Yes
4. Select Language; Click OK

5. Click Next

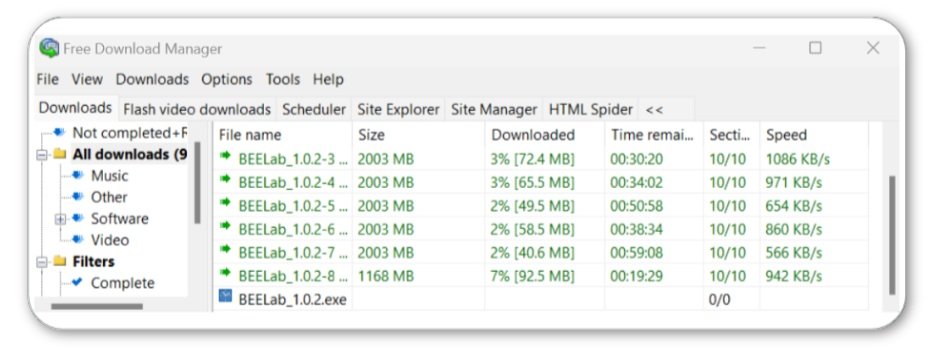
6. BEE Lab is downloading
7. Do you want to launch BEE Lab and allow this app to make changes to your device? Click Yes**

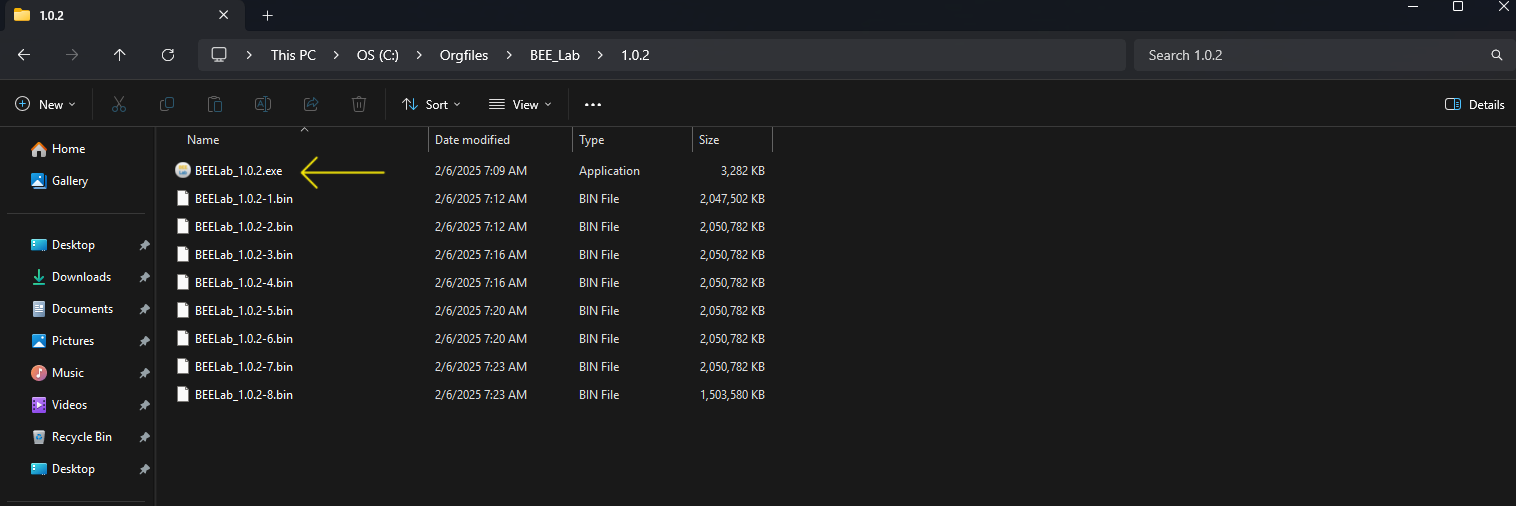
**If you miss this prompt, go to C:\Orgfiles\BEE_Lab\1.0.2 and click the Application icon to start the installation.
8. Welcome to the BEE Lab Setup Wizard; Click Next

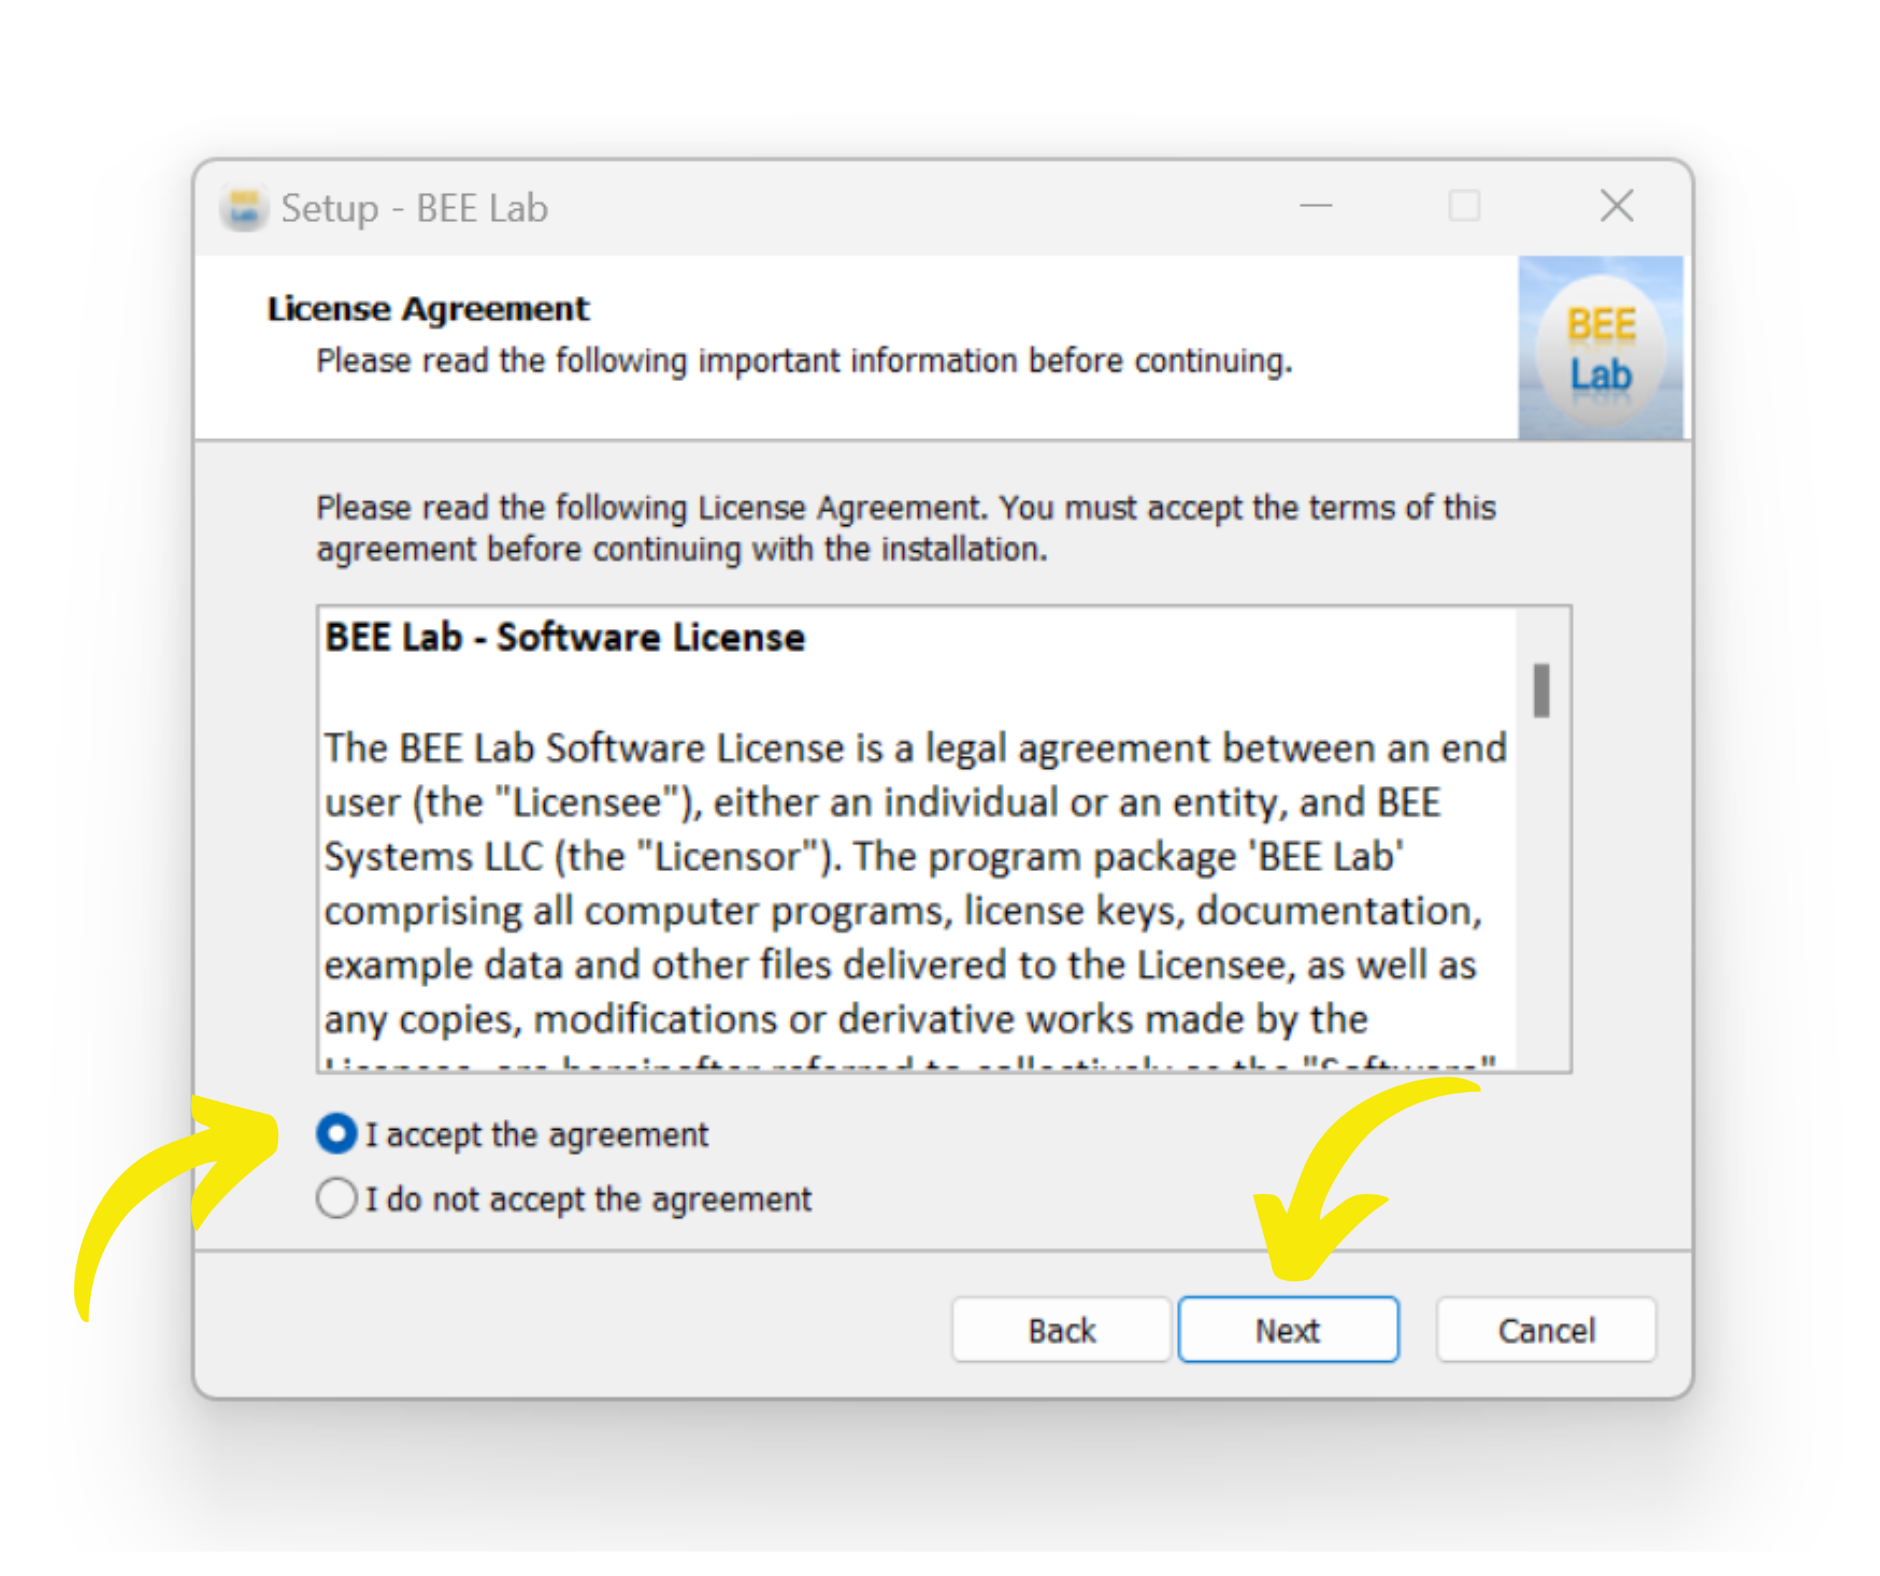
9. Accept BEE Lab License Agreement; Click Next
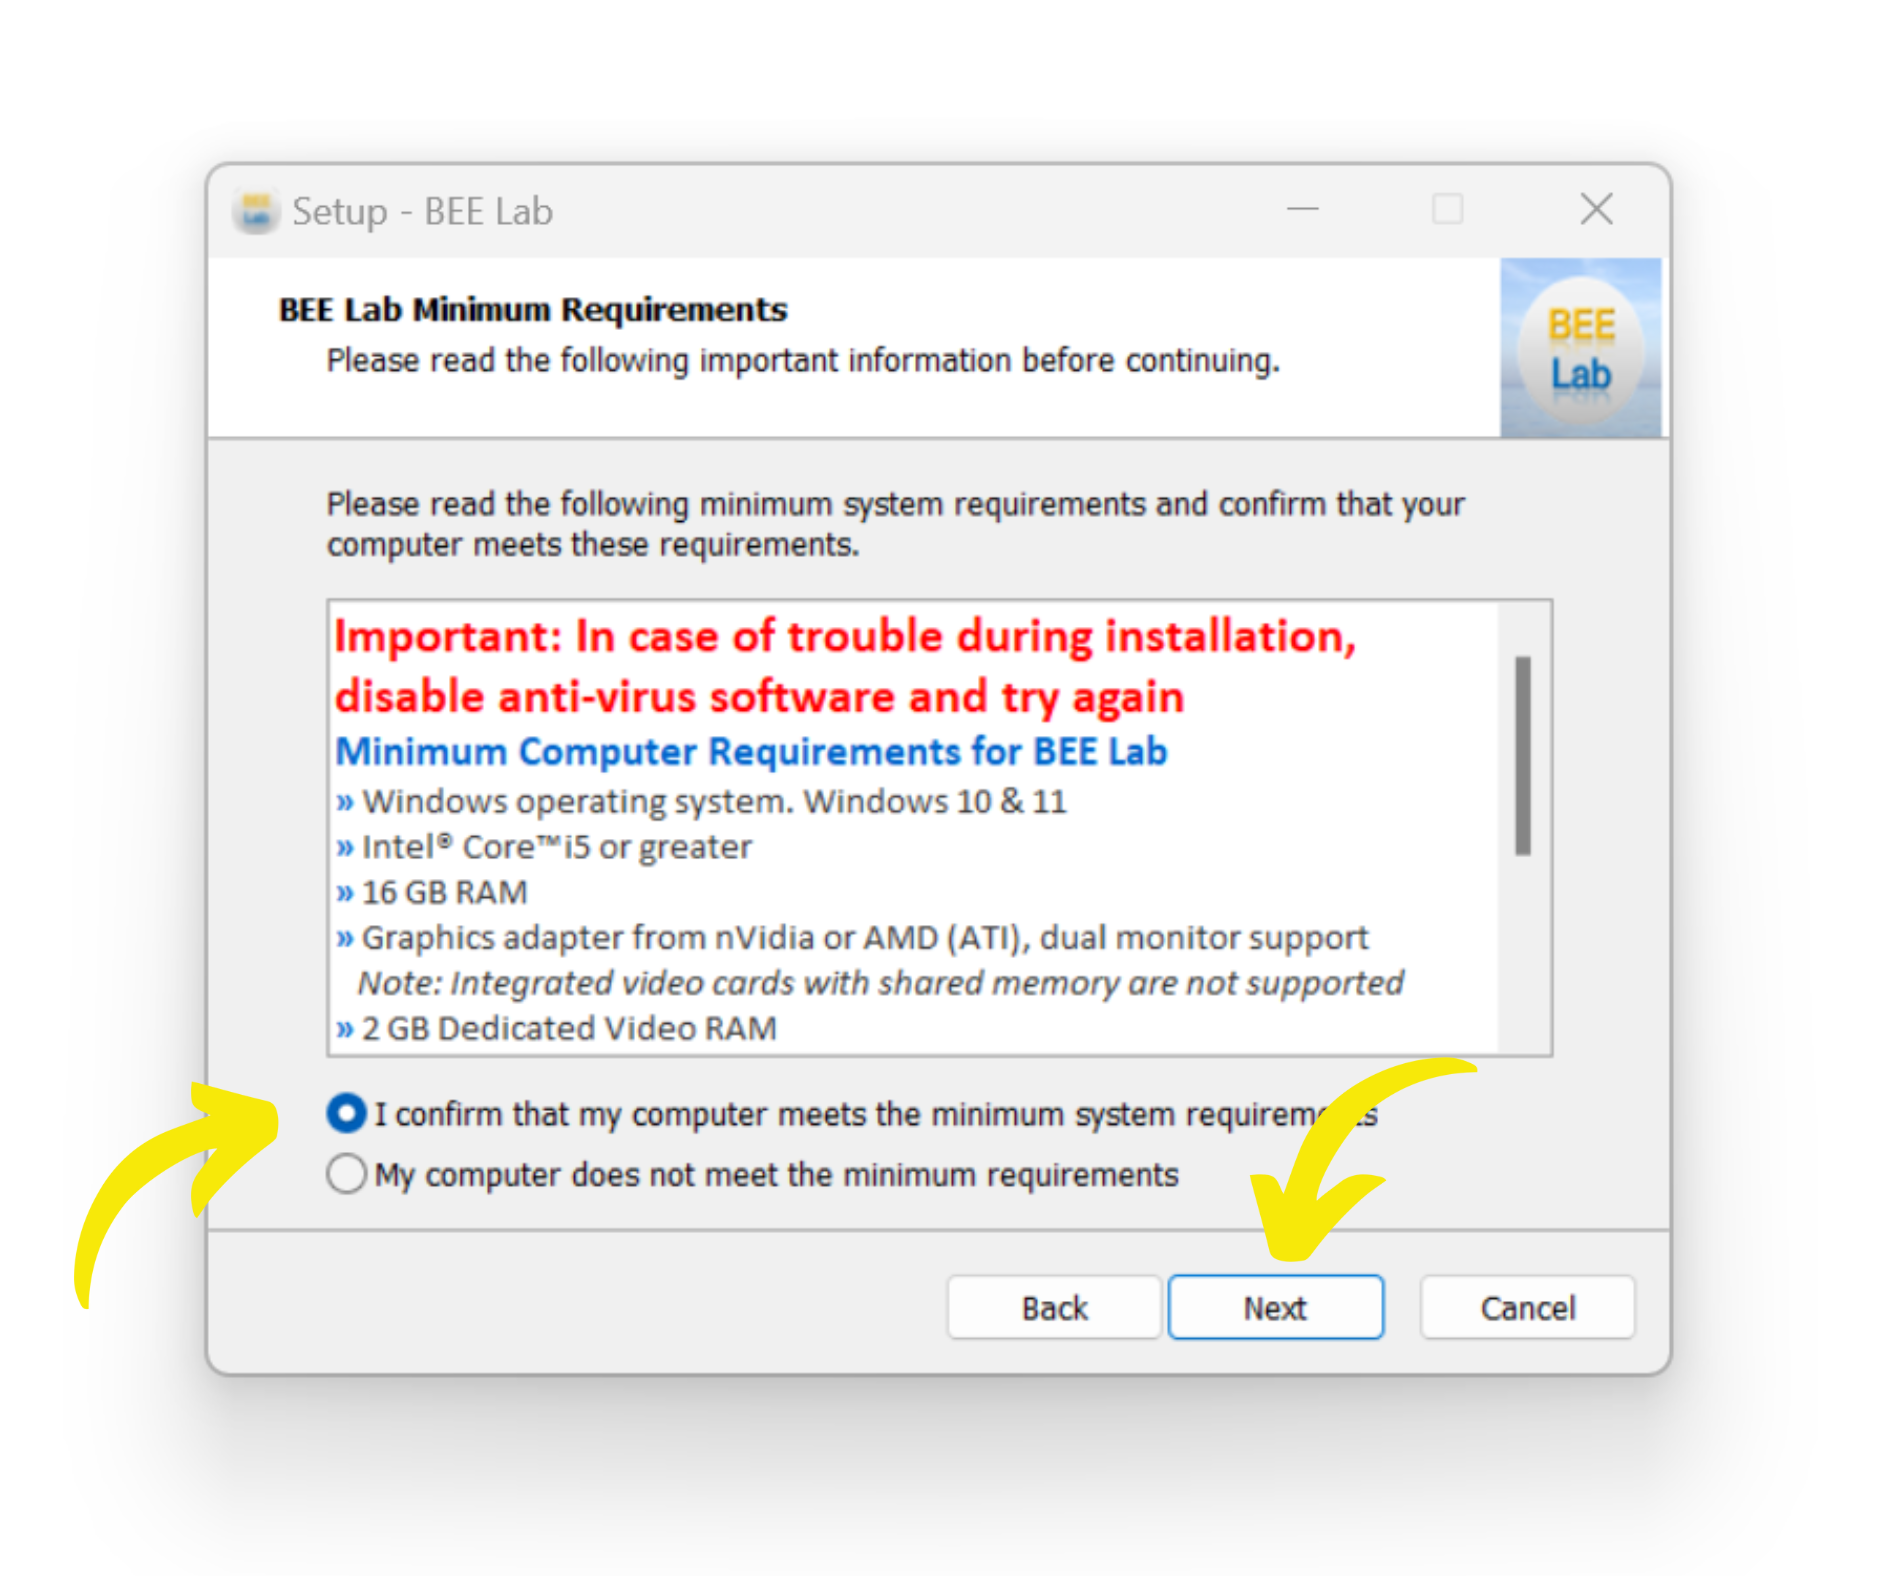
10. Confirm that your computer meets the minimum requirements, Click Next
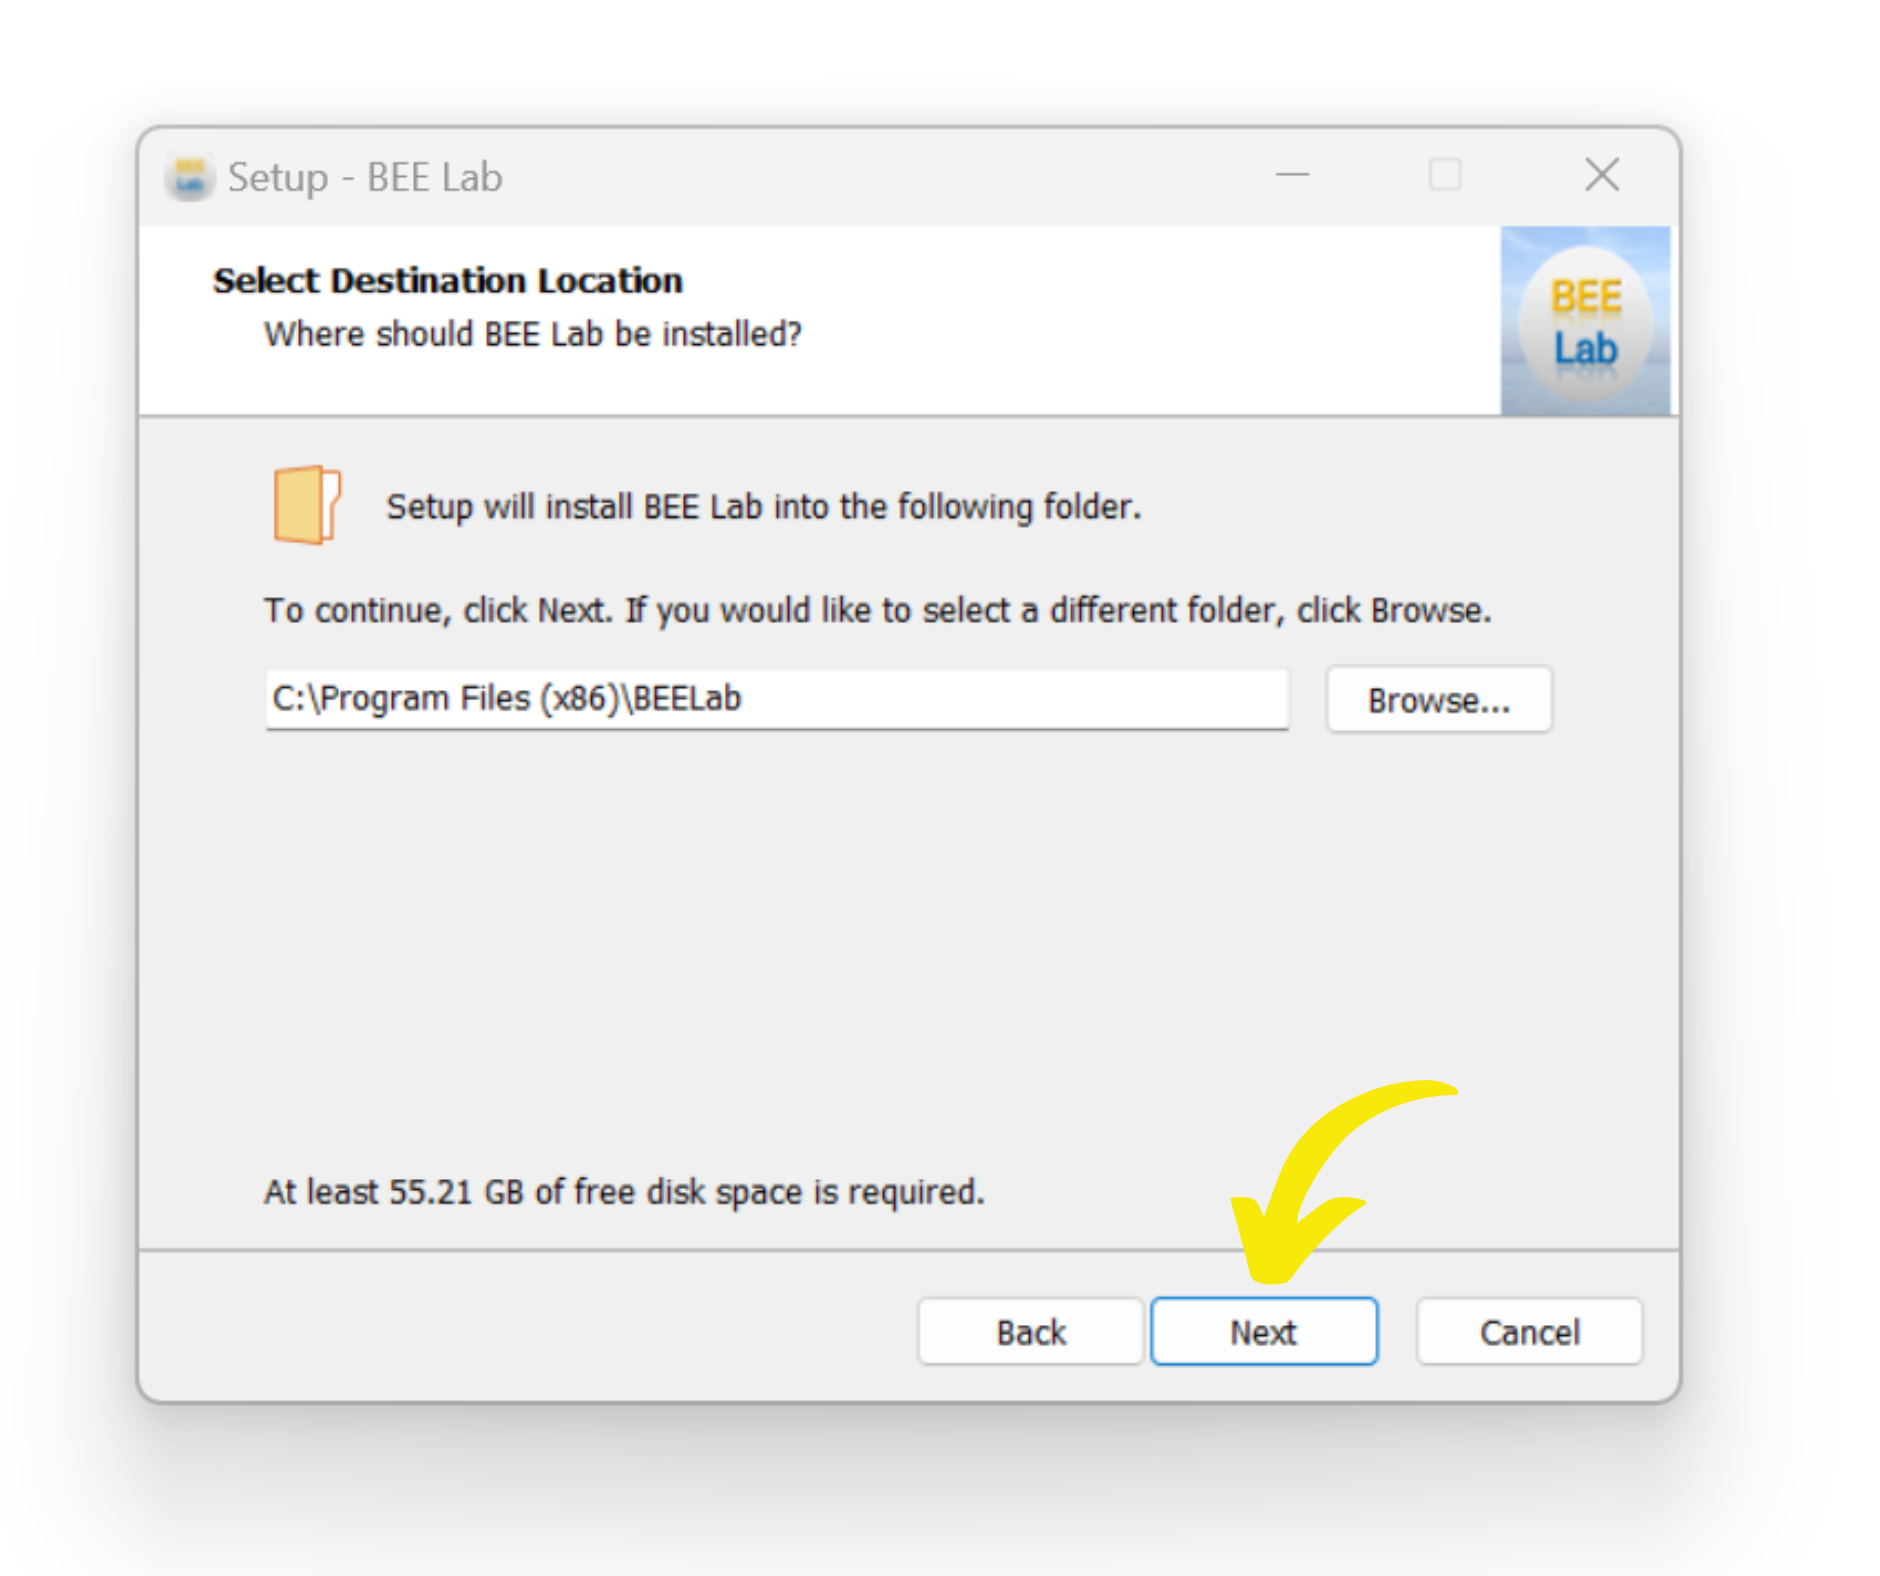
11. Keep the default installation location, Click Next
12. Create Shortcuts; Click Next

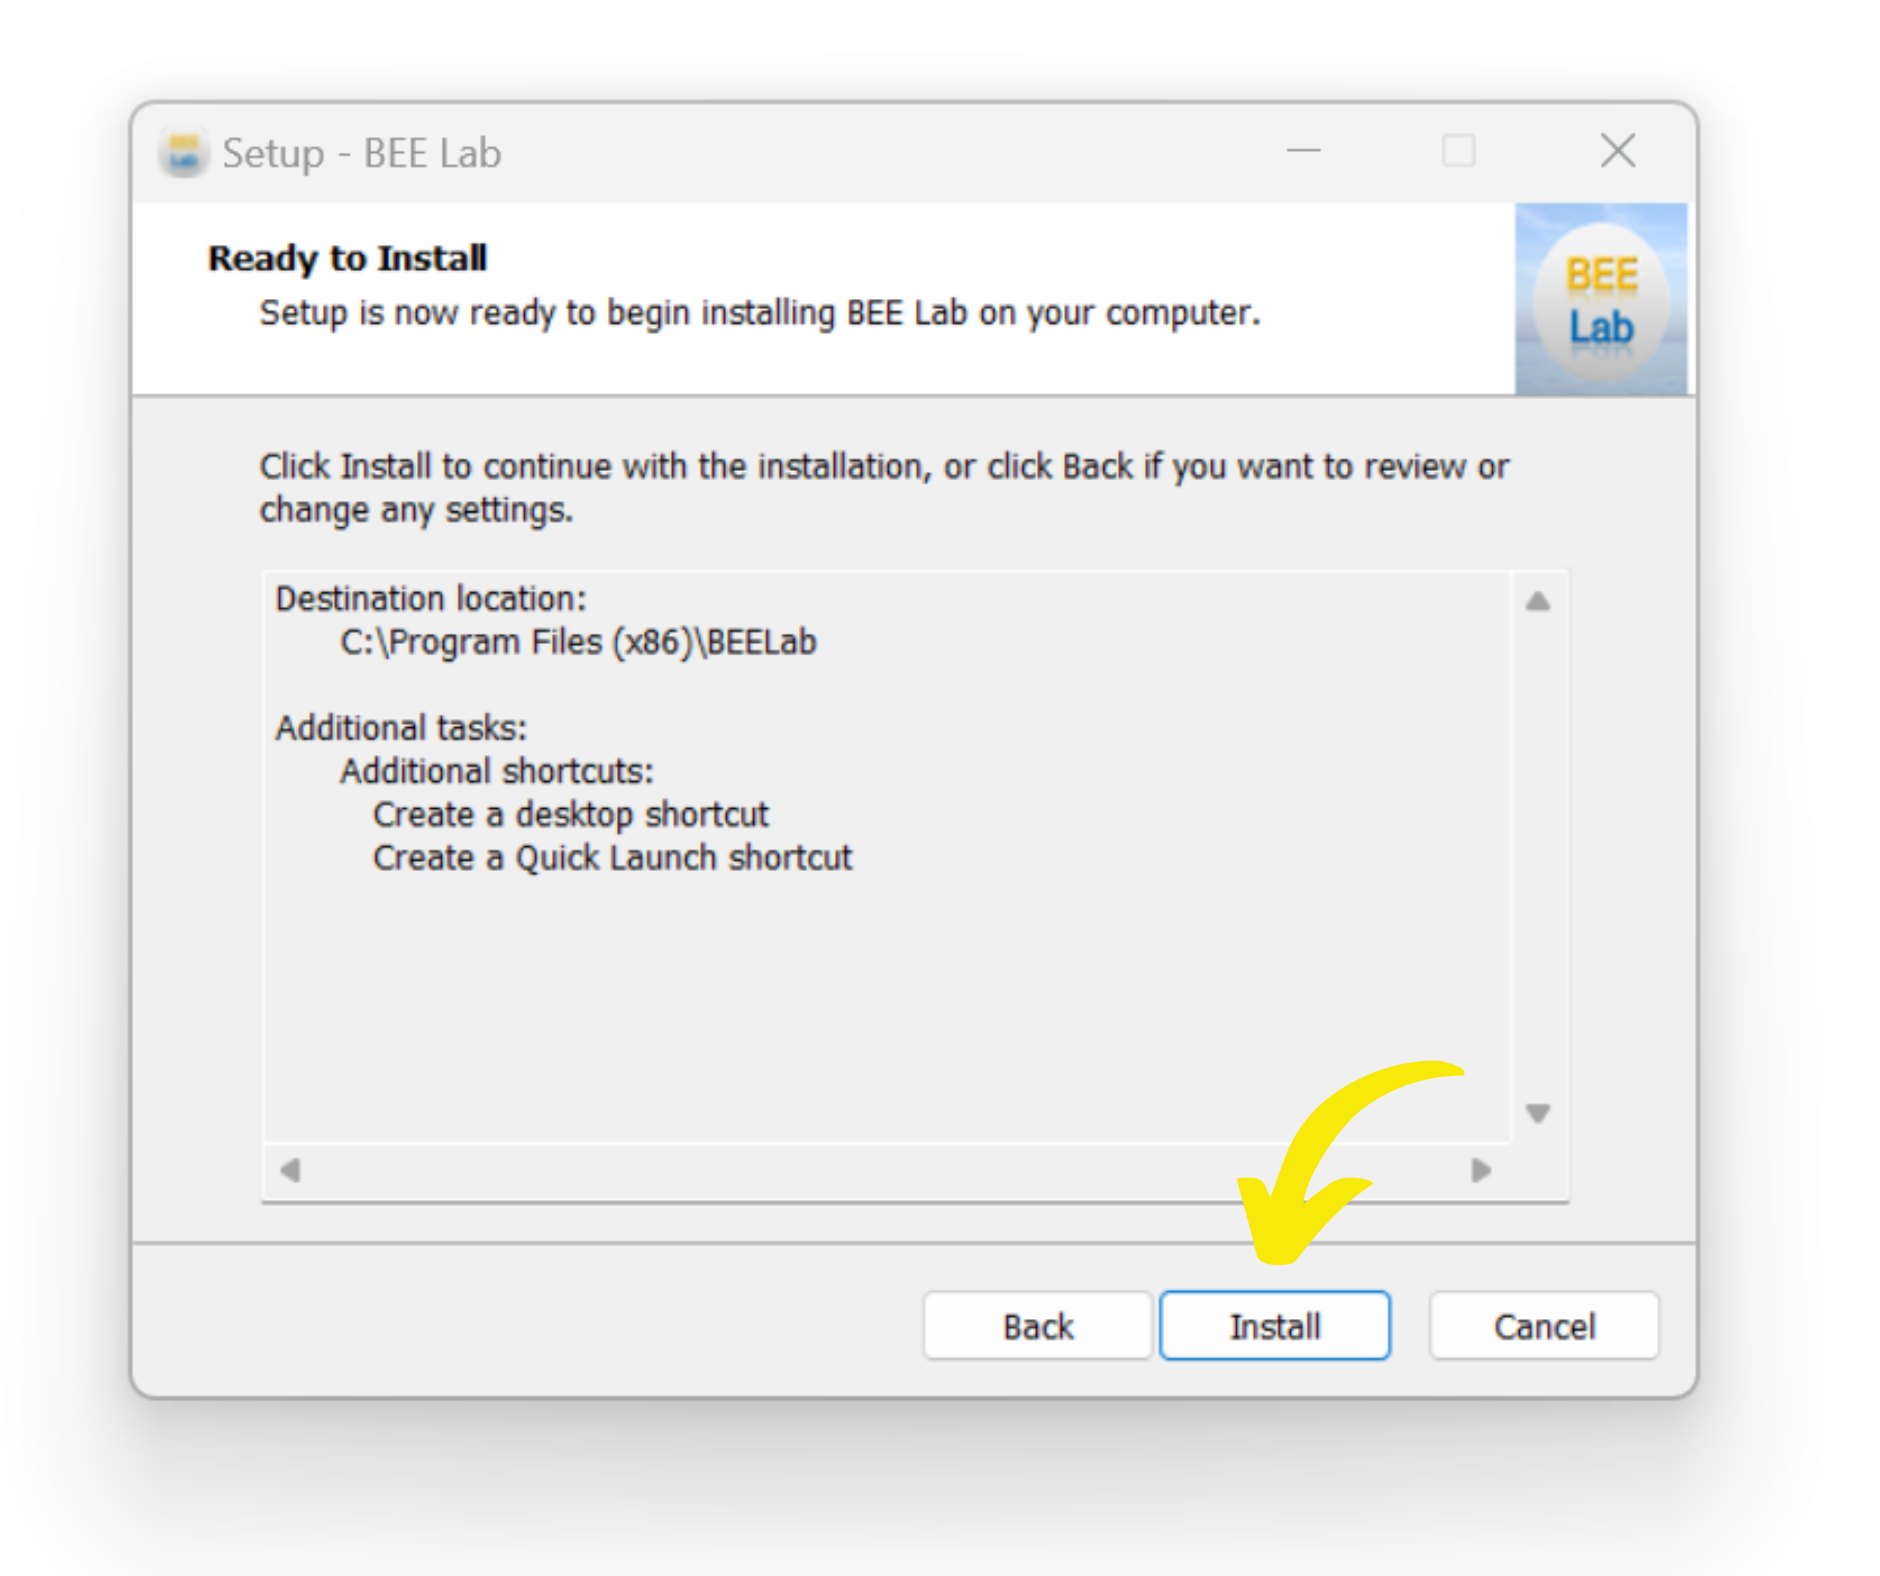
13. Ready to install; Click Install
14. Almost Done; Click Next

15. To complete the BEE Lab Setup Wizard; Click Finish